Introduction to Resin Jewelry
Resin jewelry is a beautiful, versatile, and creative craft. It allows anyone to make unique and personalized accessories. With endless design possibilities, resin jewelry has become popular among DIY enthusiasts and professionals alike.

What is Resin Jewelry?
Resin jewelry is made from liquid resin, which hardens into a durable material when cured. The resin can be colored, shaped, or mixed with embellishments like dried flowers, glitter, or tiny charms. It is often used to create earrings, necklaces, bracelets, and more. Resin jewelry can look like glass or gemstone but is lightweight and easy to work with.
Benefits of Making Resin Jewelry
Making resin jewelry is a rewarding hobby for several reasons:
- Creative Freedom: You can try endless designs, colors, and textures with resin jewelry.
- Personalized Gifts: Resin jewelry makes wonderful custom gifts for family and friends.
- Affordable Start: It requires relatively inexpensive tools and materials to begin.
- Therapeutic Process: Crafting resin jewelry can be a relaxing and satisfying activity.
- Business Opportunity: Many crafters sell resin jewelry online or at markets for extra income.
Resin jewelry is a fun and expressive way to explore your creativity while creating stunning pieces.
Tools and Materials Needed
Creating stunning resin jewelry requires specific tools and materials. Choosing quality supplies ensures the best results.

Essential Supplies for Resin Jewelry
To start crafting resin jewelry, gather the following essential supplies:
- Resin: Resin is the primary material used to make jewelry pieces.
- Hardener: This helps cure the resin, creating a solid and durable finish.
- Jewelry Molds: Silicone molds come in various designs for shaping resin.
- Mixing Cups and Sticks: Use disposable cups and wooden sticks for stirring resin and hardener.
- Gloves: Protect your hands while working with resin.
- Respirator Mask: Resin fumes may be harmful; wear a mask for safe handling.
- Embellishments: Include glitter, dye, dried flowers, and charms for decoration.
- Sandpaper: Polishing edges helps maintain a sleek finish.
- UV Lamp or Heat Gun: These tools can assist in curing certain types of resin.
- Jewelry Findings: Add clasps, hooks, or chains to complete your jewelry designs.
Types of Resin: Which One Is Best for Jewelry?
Different types of resin work well for crafting jewelry. Understand their characteristics to choose the right resin:
- Epoxy Resin: Popular for durable and glossy jewelry. It cures slowly, giving more working time.
- UV Resin: Ideal for quick creations. It cures under UV light and has a shorter working time.
- Polyurethane Resin: Best for fast-curing projects. It is reliable but emits strong odors.
Select resin based on your design needs and curing environment for optimal results.
Safety Tips When Working with Resin
Safety is a priority while crafting resin jewelry. Follow these rules to protect yourself:
- Work in a Ventilated Space: Open windows or use a fan to avoid inhaling fumes.
- Wear Protective Gear: Gloves and masks shield your skin and lungs.
- Avoid Skin Contact: Resin may cause irritation; wash immediately if it touches your skin.
- Follow Manufacturer Instructions: Read labels carefully for resin usage and curing guidelines.
- Store Resin Properly: Keep resin in a cool, dry place, away from sunlight.
By using the right tools and prioritizing safety, your resin jewelry projects will be fun and successful.
Step-by-Step Guide to Making Resin Jewelry
Creating resin jewelry is a step-by-step process. Let’s explore how to craft stunning pieces with ease.
Preparing Your Workspace
- Choose a Clean Space: Work on a flat and dust-free surface.
- Protect the Area: Cover your workspace with wax paper or plastic sheets.
- Gather Your Supplies: Keep all tools and materials within reach.
- Ensure Ventilation: Work in a well-ventilated room to minimize fume exposure.
- Wear Safety Gear: Use gloves and a respirator mask for protection.
Mixing and Coloring Resin
- Measure Resin and Hardener: Follow the manufacturer’s recommended ratio for your resin type.
- Mix Slowly: Stir thoroughly to avoid bubbles and ensure the mixture is clear.
- Add Color: Mix in resin dyes, pigments, or inks for vibrant effects.
- Test the Shade: Use a small portion to test the color before committing.
Pouring Resin into Molds
- Select a Mold: Choose a silicone mold in your desired shape.
- Prepare the Mold: Ensure it is clean and dry before pouring resin.
- Fill the Mold: Pour slowly to minimize air bubbles.
- Tap Gently: Tap the mold lightly to release trapped bubbles.
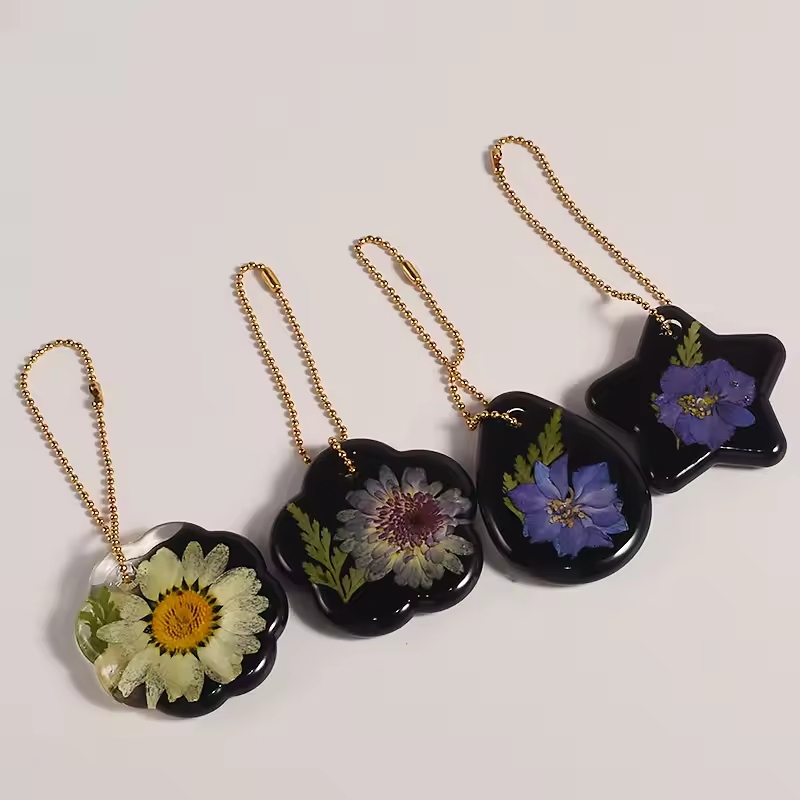
Adding Embellishments: Flowers, Glitter, and More
- Choose Decorations: Select dried flowers, glitter, or small charms.
- Place Carefully: Add embellishments to the mold after pouring resin.
- Use Tools: Position them with tweezers to avoid messy hands.
- Layer Resin: Pour more resin to cover the embellishments completely.
Curing and Finishing Your Resin Pieces
- Let It Cure: Leave the resin to cure as per the product instructions.
- Check Hardness: Ensure the piece is solid and dry before removing it.
- Demold Slowly: Remove the resin piece gently to avoid breaking.
- Sand Edges: Use sandpaper to smooth rough or sharp edges.
- Polish and Assemble: Polish the surface and add findings to complete the jewelry.
By following these steps, you can make beautiful and durable resin jewelry.
Creative Design Ideas for Resin Jewelry
Unleash your creativity with resin jewelry by exploring different designs and styles. From timeless classics to bold innovations, resin offers endless possibilities.
Earrings, Necklaces, and Bracelets
Resin is perfect for crafting a variety of accessories. Here are some creative ideas:
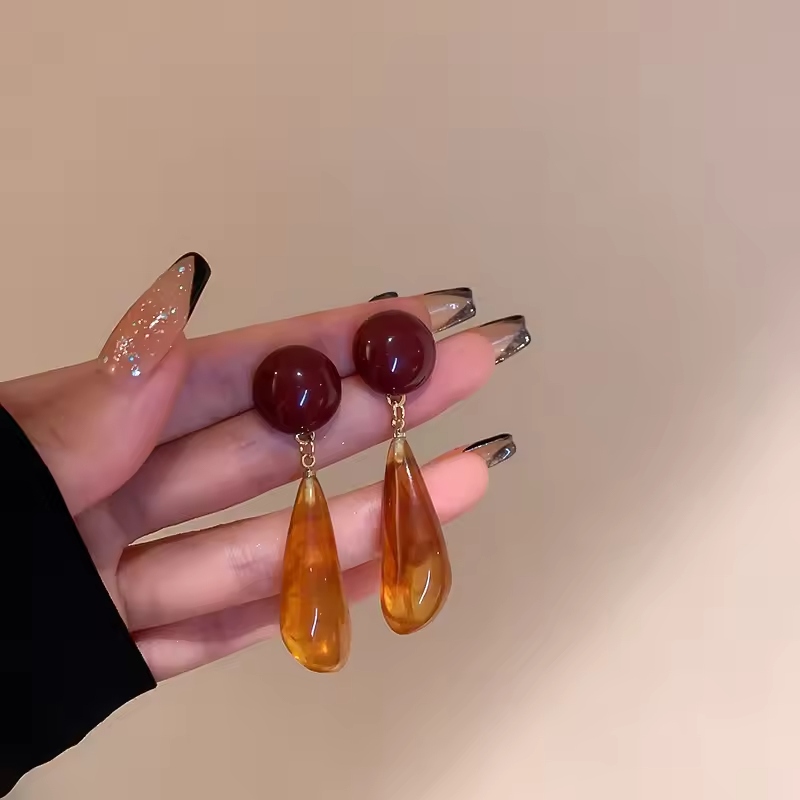
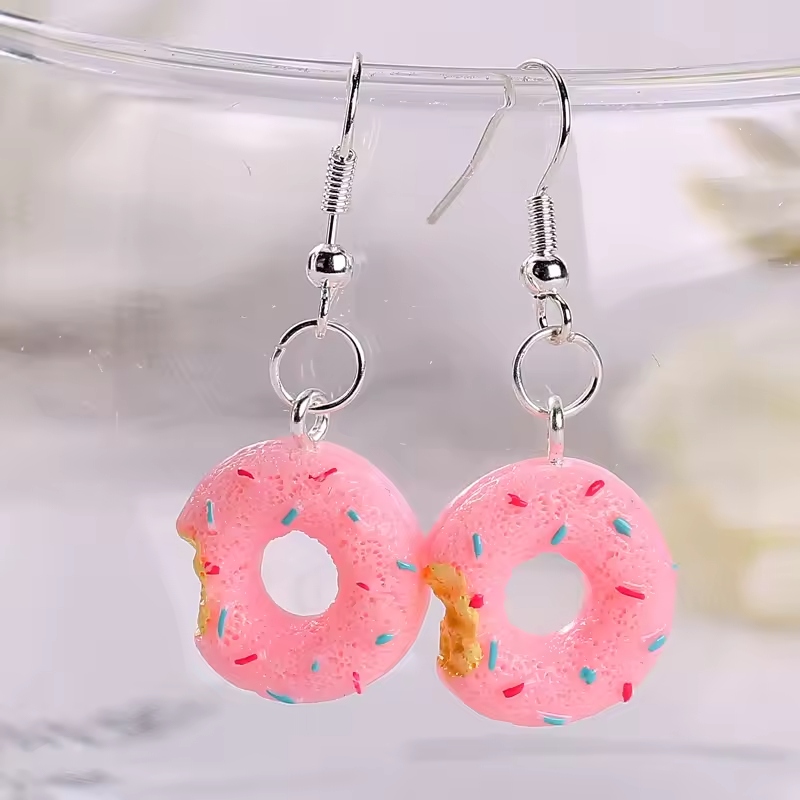
- Earrings: Create small, lightweight pieces in round, teardrop, or abstract shapes. Add glitter or floral inclusions for a unique shine.
- Necklaces: Experiment with pendants in geometric shapes or layered looks for modern aesthetics.
- Bracelets: Use molds for bangles or embed decorative elements for charm bracelets.
Tailor each piece to personal occasions or gifting purposes, letting your imagination guide the process.
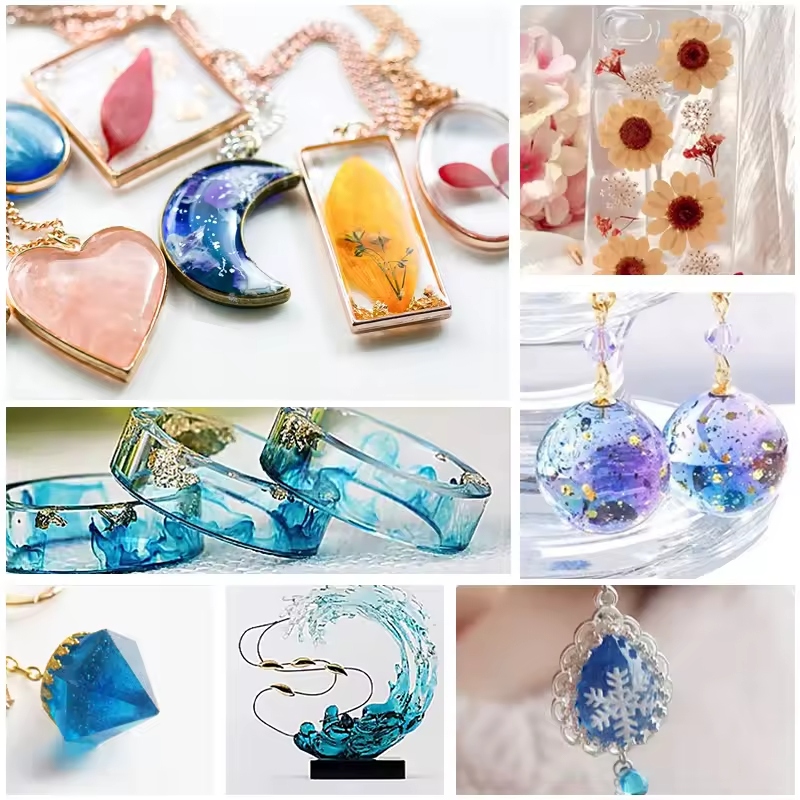
Exploring Unique Shapes and Patterns
Think beyond standard designs by crafting resin jewelry in distinctive shapes and patterns:
- Nature-Inspired Shapes: Try leaf, butterfly, or seashell molds for organic themes.
- Abstract Patterns: Swirl multiple resin colors for stunning marbled effects or galaxy-like looks.
- Geometric Designs: Use square, hexagon, and triangular molds for a modern feel.
Combining patterns and shapes can make your pieces even more unique and captivating.
Using UV Resin for Quick Creations
UV resin is ideal for making jewelry quickly. It hardens under UV light in minutes:
- Pendants: Pour UV resin into small molds, insert charms, and cure instantly.
- Tiny Details: Use UV resin to seal embellishments or add finishing layers to designs.
- Layered Looks: Work in stages, curing each layer for a dimensional effect.
UV resin minimizes waiting time, making it perfect for personalized gifts or last-minute projects.
By experimenting with these ideas, you can create one-of-a-kind resin jewelry that’s stylish and meaningful.
Troubleshooting Common Issues
Even experienced crafters face challenges when making resin jewelry. Here’s how to solve common issues.
Fixing Air Bubbles in Resin
Bubbles in resin can ruin the look of your jewelry. Follow these tips to minimize them:
- Mix Slowly: Stir the resin and hardener gently to avoid introducing bubbles.
- Use a Heat Gun or Torch: Run a heat tool over the surface to pop bubbles.
- Warm Resin Before Mixing: Slightly warming the resin can help reduce bubble formation.
- Tap the Mold: After pouring, tap the mold gently to release trapped air.
- Apply Layering Technique: Pour resin in thin layers, removing bubbles between each layer.
Tackling Sticky or Uncured Resin
Sticky or uncured resin can occur due to incorrect curing. Address this issue as follows:
- Follow Proper Ratios: Always measure resin and hardener according to the manufacturer’s instructions.
- Ensure Thorough Mixing: Stir for 2-3 minutes, ensuring the mixture is uniform and clear.
- Check Temperature: Work in a room with the recommended temperature for curing.
- Allow Extra Time: Some resins need more time to cure, so be patient.
- Recoat with Fresh Resin: If sticky, apply a thin layer of properly mixed resin to fix the piece.
Avoiding Mold Imperfections
Imperfections in molds can impact the final piece’s quality. Prevent them with these tips:
- Clean Molds Thoroughly: Wash molds with soap and water, ensuring they’re free of dust or debris.
- Check for Mold Damage: Inspect molds for tears or wear before use.
- Use Mold Release Agent: Apply a release spray for easy demolding and smooth surfaces.
- Pour Slowly and Precisely: Slow pouring avoids overfilling and maintains the mold’s integrity.
- Store Molds Properly: Keep them in a cool, dry place to maintain their shape and cleanliness.
By addressing these problems, you can craft flawless resin jewelry with confidence.
Caring for and Selling Resin Jewelry
Proper care and effective selling techniques will enhance the charm of your resin jewelry. Whether you’re maintaining personal pieces or starting a business, attention to detail matters.
How to Maintain Resin Jewelry
To keep resin jewelry looking stunning, follow these simple care tips:
- Avoid Prolonged Sunlight: UV rays may cause discoloration or weakening of the resin.
- Keep Away from Harsh Chemicals: Perfumes, cleaning agents, or hairsprays can dull the finish.
- Store Properly: Use a soft cloth pouch or jewelry box to prevent scratches.
- Clean Gently: Use a damp cloth to wipe the surface. Avoid abrasive cleaners.
- Avoid High Heat: Extreme temperatures can warp or damage resin pieces.
These steps will help extend the life and appearance of your jewelry.
Packaging and Display for Sales
When selling resin jewelry, presentation plays a key role in attracting customers. Consider the following:
- Use Attractive Packaging: Use eco-friendly boxes or velvet pouches that reflect your brand style.
- Add Care Instructions: Include a small card with tips on maintaining the resin jewelry.
- Create an Eye-Catching Display: Use stands, trays, and creative arrangements to showcase pieces.
- Label Clearly: Tag each piece with details like material, price, and special features.
- Use Good Lighting: Bright lighting enhances the sparkle and colors of resin jewelry.
Effective packaging and display can leave a lasting impression on customers.
Tips for Starting a Jewelry Business
Turning your resin jewelry hobby into a business requires careful planning. Here are some helpful tips:
- Research Your Market: Identify your target audience and popular trends.
- Set Competitive Prices: Consider material costs and time while pricing your pieces.
- Utilize Social Media: Share pictures and stories about your creations to promote your brand.
- Build an Online Store: Use platforms like Etsy or your website to sell your pieces.
- Engage Customers: Offer discounts, giveaways, or custom design options for a personal touch.
Starting a jewelry business can be a rewarding endeavor with the right strategies.
Frequently Asked Questions
Is Resin Jewelry Safe to Wear?
Yes, resin jewelry is safe to wear when properly cured. Fully cured resin is non-toxic and skin-friendly. However, people with sensitive skin should use caution. It’s important to avoid unfinished or sticky resin pieces. Properly cured resin products do not release harmful chemicals. Always read and follow the resin manufacturer’s safety instructions.
How Long Does Resin Jewelry Last?
Resin jewelry can last for many years with proper care. The durability depends on the quality of resin used. Avoid prolonged exposure to sunlight, as UV rays can discolor or weaken resin. Store pieces in a cool, dry place away from direct heat. Regular cleaning with a soft cloth helps maintain its shine and longevity. With good maintenance, resin jewelry stays beautiful for decades.
Can You Reuse Molds for Resin Jewelry?
Yes, silicone molds for resin jewelry are reusable. Clean molds thoroughly after every use. Avoid using sharp tools that could damage the mold’s surface. Use a mold release agent to make demolding easier and prevent wear. Proper care ensures molds stay in good condition for multiple projects. Always store molds in a flat, dry, and dust-free environment.